-40%
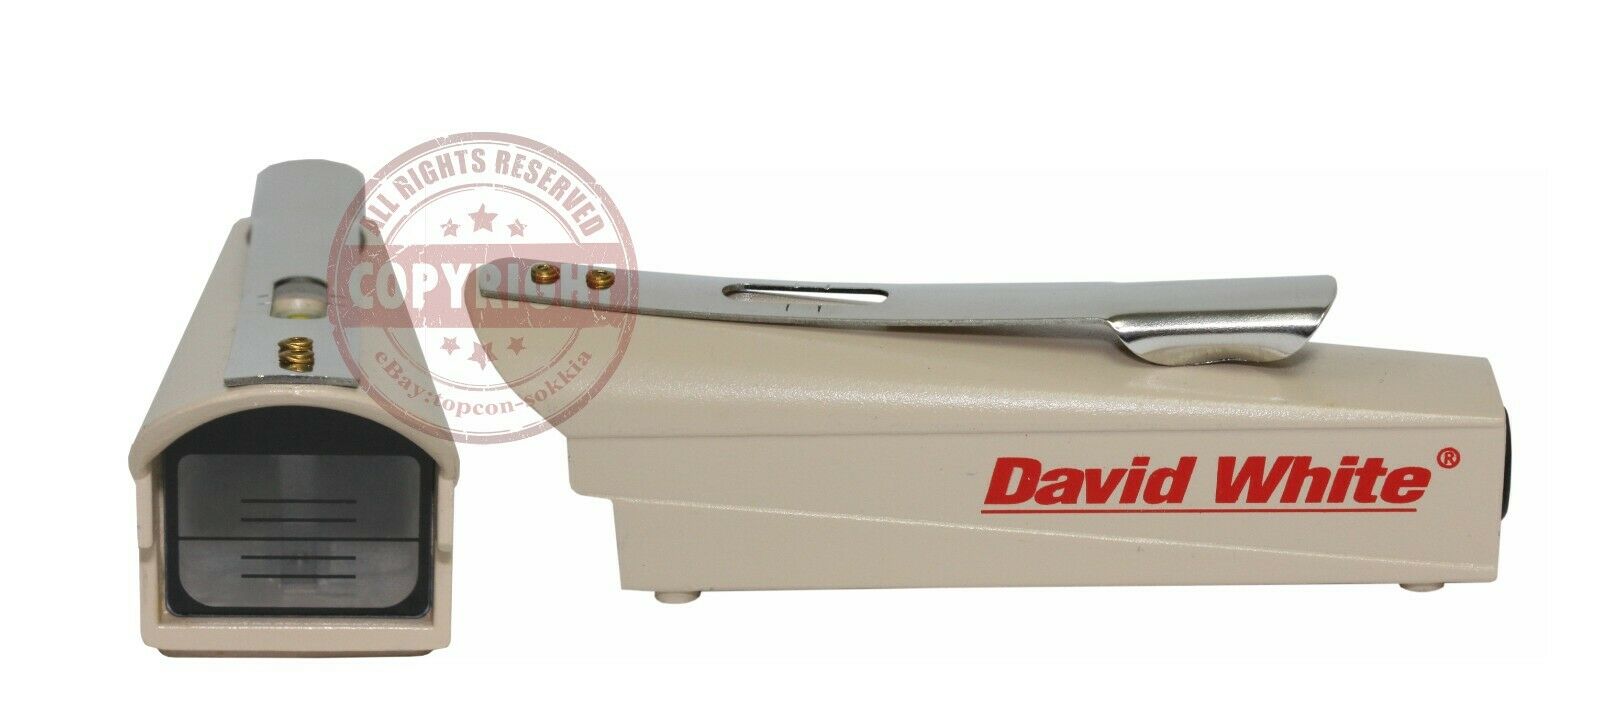
DAVID WHITE HAND LEVEL,SURVEY,GRADE CHECKING,PEA GUN,ELEVATION,DIRT WORK
$ 21.09
- Description
- Size Guide
Description
David White pocket sighting level will quickly and easily approximate the level of retaining walls, batter boards, fences, etc. It has an easy to read protected level vial and the built in sunshade allows for glare free viewing. The hand level is easily transportable with its convenient pocket clip. The impact resistant body, makes it a durable and sturdy tool for a wide array of applications.Determining Differences in Elevation
Place the leveling rod or stick at a convenient distance. Sight through the eyepiece and with bubble centered, note or mark reading on rod or stick. For example: First reading on rod is 5ft. Move rod to new location and take a second reading. This reading is 3ft. Difference in elevation between the first and second reading is 2ft.
Estimating Distances
The distance between the top line and the bottom line on the object glass is equal to a ratio of 1:12. If the user is looking at a sighting rod and the top line crosses the rod at 5 ft. and the bottom line at 4ft. The user is 12 ft away from the rod.
Setting Wall Tiles in a Level Line
Rest the pocket level on a convenient surface or stand erect holding it to your eye, and sight through the pocket level at the wall to be tiled. When bubble is centered on the long center line, mark wall in line with the long center line. Repeat this step one or more times along wall. By measuring up or down from these marks to the height desired, you have a level starting line.
Setting Fence with Level Top
Drive two poles into the ground, one at each end of the fence location. Rest the pocket level on convenient surface or stand erect holding it to your eye and sight on one of the poles. When the bubble is centered on long center line, mark pole in line with the ling center line. Repeat on second pole, sighting from the same position. By measuring up or down from these marks to the height desired, you have a level line for the top of your fence.
Grading a Driveway
Establish roughly the ends of the driveway and drive poles into the ground every ten feet. Sight the nearest pole. If you are standing at the upper end of the driveway and desire a 1/4" per foot grade, center the bubble on the first line below the long center line and mark the pole in line with the long center line. Sight each pole in the same way from the same position. If standing at lower end of the driveway, use the first line above the long center line. Drive a stake into the ground next to the first pole so the top of the stake is at the desired driveway height. Next, measure from the mark on the post to the top of the stake. Drive stakes next to each of the poles and set them so the tops are the same distance below the mark you established on the first pole.
The stake tops now correspond to the grade of 1/4" per foot. For a 1/2" per foot grade use the second line above or below the long center line.
Establishing a Slope
For setting grades other than 1/4" or 1/2" per foot, drive poles into ground at equal distances every ten or twenty feet or other convenient distance. Rest pocket level on convenient surface or stand erect holding it to your eye and sight the first pole. When bubble is centered on the ling center line, mark pole in line with the long center in line. Sight each pole the same way from the same position. These marks are now level. By measuring an amount equal to the slope required from these marks, you can establish a line for any slope.
Contour Farming and Terracing
Set a leveling rod or stick at the point where the furrow will be started in the field. Sight in the rod or stick and mark the position with a narrow strip of cloth or target. Drive a stake at this spot. Move the rod or stick to the next convenient location. By moving up or down the slope until a level line of sight hits the cloth or target, the point along the contour is determined. When a furrow is plows between the two stake points the elevation will be the same at both points.
BY PLACING A BID YOU AGREE TO THE TERMS OF SALE
TERMS OF SALE:
Winning an auction is Agreeing to purchase the item. PLEASE READ THE DESCRIPTION, LOOK AT PICTURES, RESEARCH THE ITEM THAT YOU ARE BIDDING ON, AND ASK ALL QUESTIONS PRIOR TO BIDDING. If you change your mind (for any reason) after bidding and winning, there will be a 15% restocking fee in order to a non paying bidder alerts from being filed. For quickest processing time please use PayPal (not PayPal e-check as it takes up to 7 days to clear). All checks take up to 10 days to clear OUR bank, items will not be shipped until the payment clears OUR bank. By bidding, you are agreeing to the bidding price, shipping price, applicable taxes and all of the terms on this item page; PLEASE ONLY BID IF YOU AGREE TO OUR TERMS AND CONDITIONS.
All items are packed to the requirements of the carrier. If an item is damaged or lost in shipment, please contact the shipping carrier directly to file a claim.
All items are insured up to the purchase price of the item.
We do not issue any type of refunds on lost or items damaged in shipping.
INTERNATIONAL BIDDERS:
Import duties, taxes and fees are not included in the item price, these charges are buyers responsibility. Please check with your country's customs office to determine what those charges might be.
Crain durable CR Leveling Rods
